Let’s talk about MegaTrees. If you’re like I was a year ago, you’ve seen videos of these massive, glowing pillars of awesome in other people’s shows and thought “I want that… but how do I build one?”
Here’s the thing: MegaTrees look intimidating, but once you break them down into a series of simple decisions, they’re actually one of the more straightforward props you’ll build. Yeah, I said it. The focal point of your show? Not as scary as it seems.
Let me walk you through how I built mine, and more importantly, how you can think through building yours.
My Tree (The TL;DR Version)
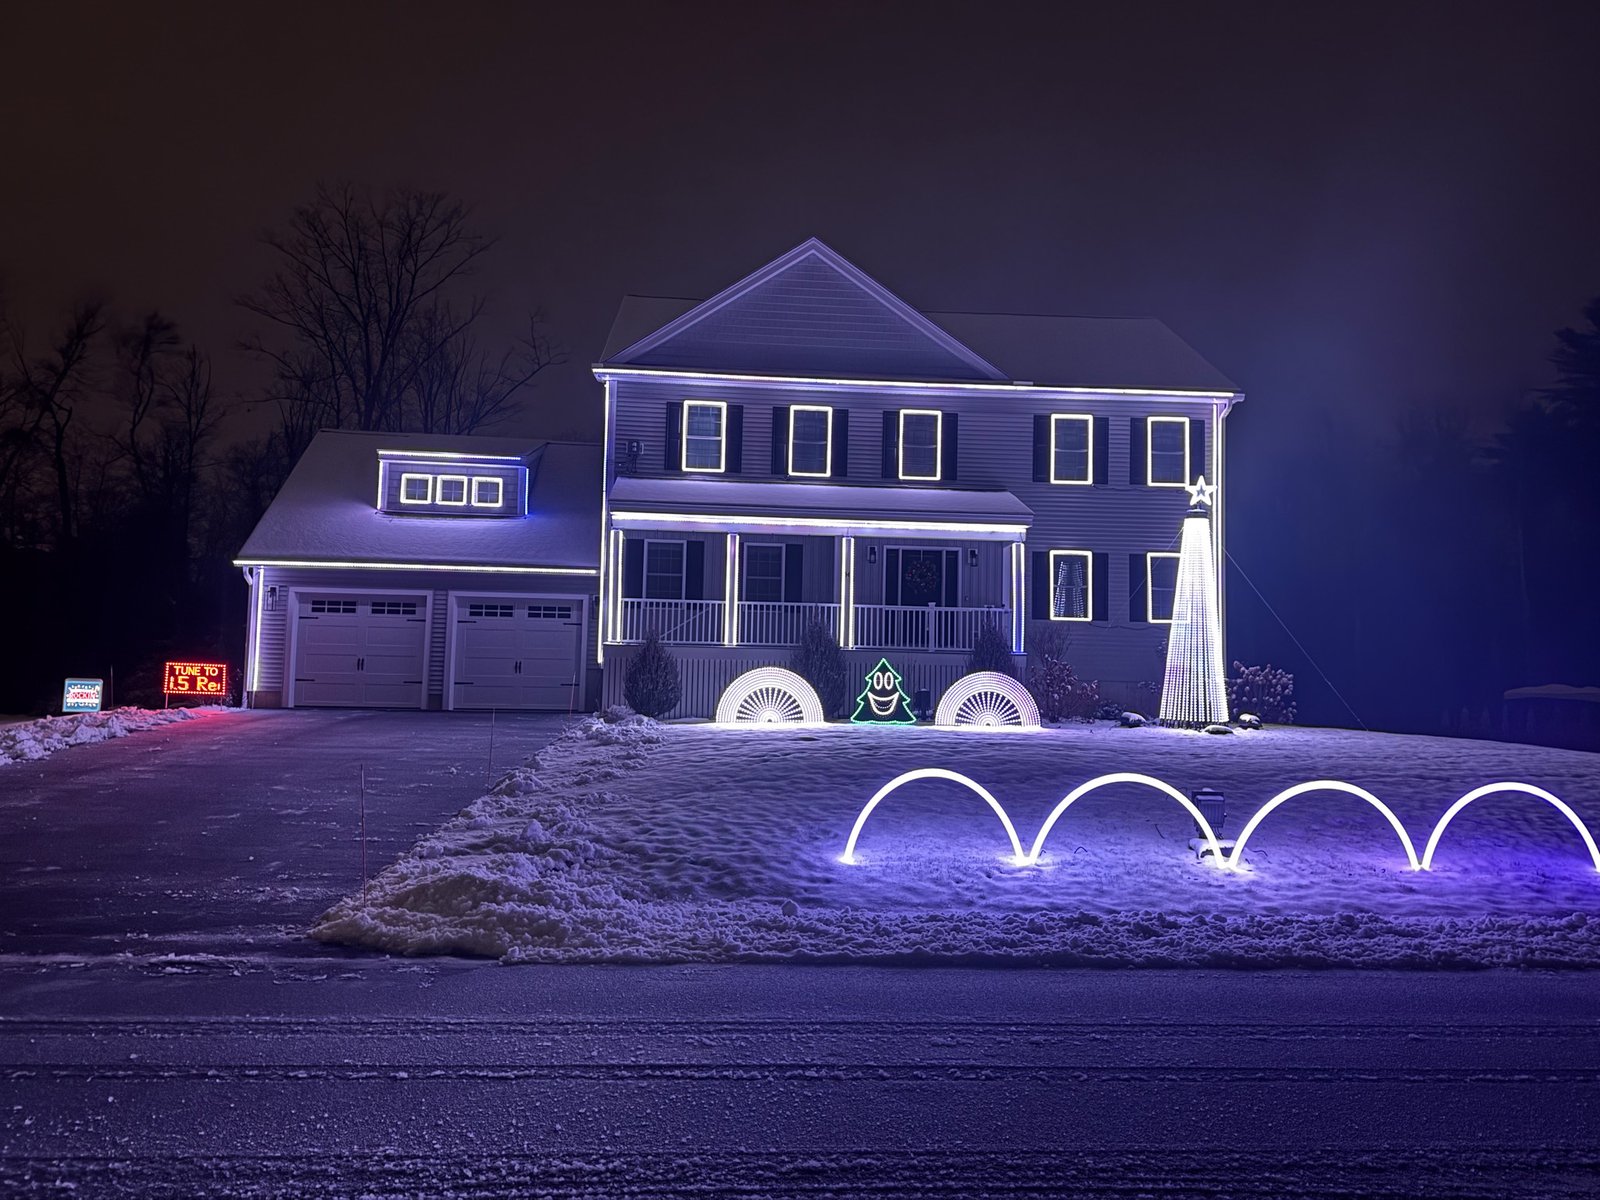
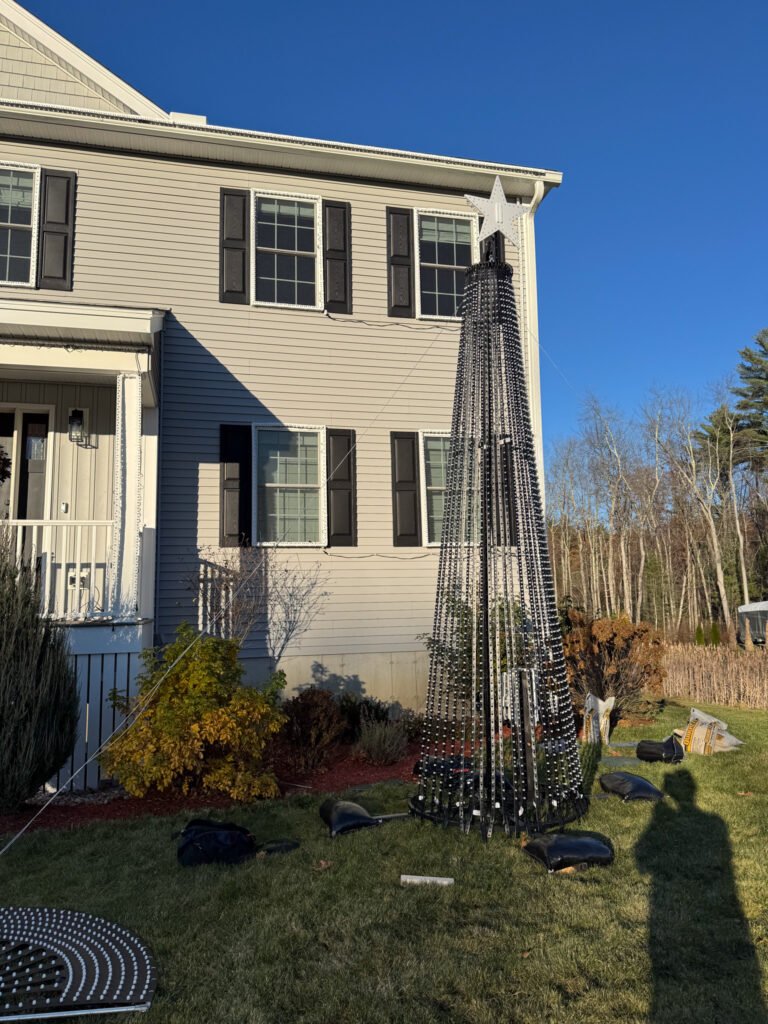
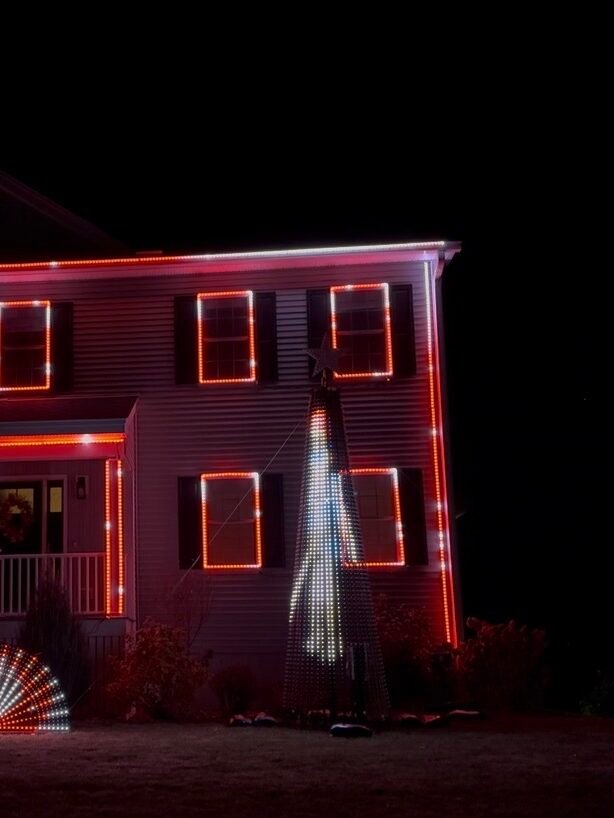
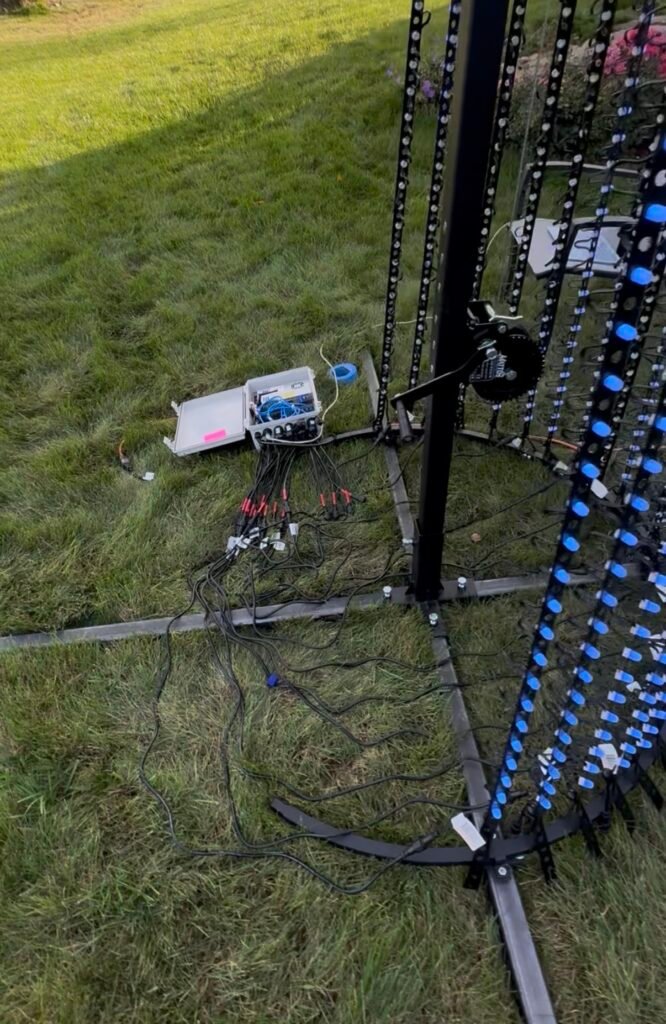
Before we dive in, here’s what I ended up with: a 14-foot tall, 5-foot wide beast using parts from Mattos’ Sasquatch MegaTree kit. I’ve got 1,800 pixels spread across 12 strings (150 pixels each) with 2-inch spacing between lights. The whole thing sits on an 8-foot steel base, secured with 2 guy wires and about 250 pounds of sand.
Did it survive 40+ MPH winds this winter? No problem. Did I stress about it during every windstorm? Absolutely. But it held strong.
Now let’s break down how you make your own decisions.
Decision #1: Size (Start Here, Even If You Don’t Have All the Answers)
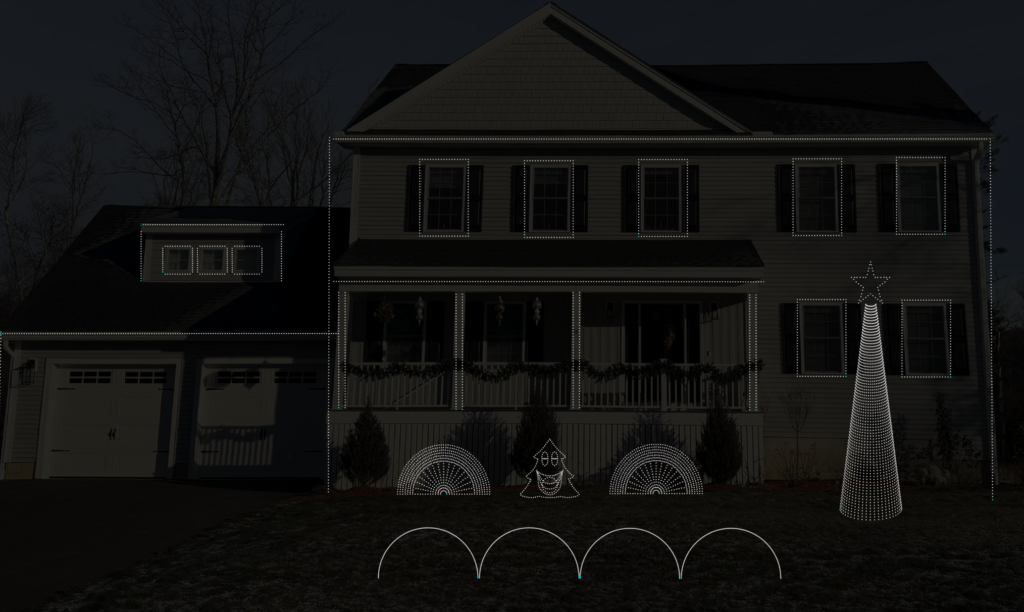
I figured out my tree dimensions in xLights before I bought a single part. I clicked the Tree icon, drew a tree in my layout, and settled on just under 14 feet tall and about 5 feet wide at the base. Done. I told myself I’d figure out the construction details later.
There is a great calculator that helped me do some planning: https://www.lightshowhub.com/tools/mega-tree-calculator
Why those dimensions? I wanted the tree to be an undeniable statement piece: tall enough that people driving by couldn’t miss it. But I also wanted the pixel strands relatively close together (hence the 5-foot wide base) because tighter spacing makes animations easier to see. After visiting a bunch of shows this past season, I noticed my tree is narrower than most, and honestly? I love it. The animations are crisp and clear.
The key here: Size is the hardest thing to change later without buying all new pixels. So take your time with this decision, but don’t let it paralyze you. Draw it in xLights, look at it in your yard layout, and commit.
Decision #2: Degrees (180 or 360?)
This one’s simpler than you think: who’s looking at your tree?
My tree is close to my house, and everyone views it from the street. Nobody’s walking around behind it. So, I went with a 180-degree tree. Saved money, saved time, saved pixels.
If your tree is in an open area, away from your house, or you’re on a corner lot where people see it from multiple angles? Go 360, maybe 270. Otherwise, save yourself the hassle.
Decision #3: Construction Method
This is where you’ll see a lot of debate. The two main camps:
Option A: ASAP Tree (A Strap And a Pole)
Plenty of people swear by this approach. Mr. Creeds has an excellent writeup on his ASAP build (https://mrcreedslights.com/mega-tree/), and I seriously considered going this route. It’s cost-effective and proven.
Option B: Mattos’ Sasquatch MegaTree
This is what I went with, and here’s why: I liked the square tubular design (better wind handling in my opinion—though you should always use guy wires regardless), and I could order most parts from one vendor.
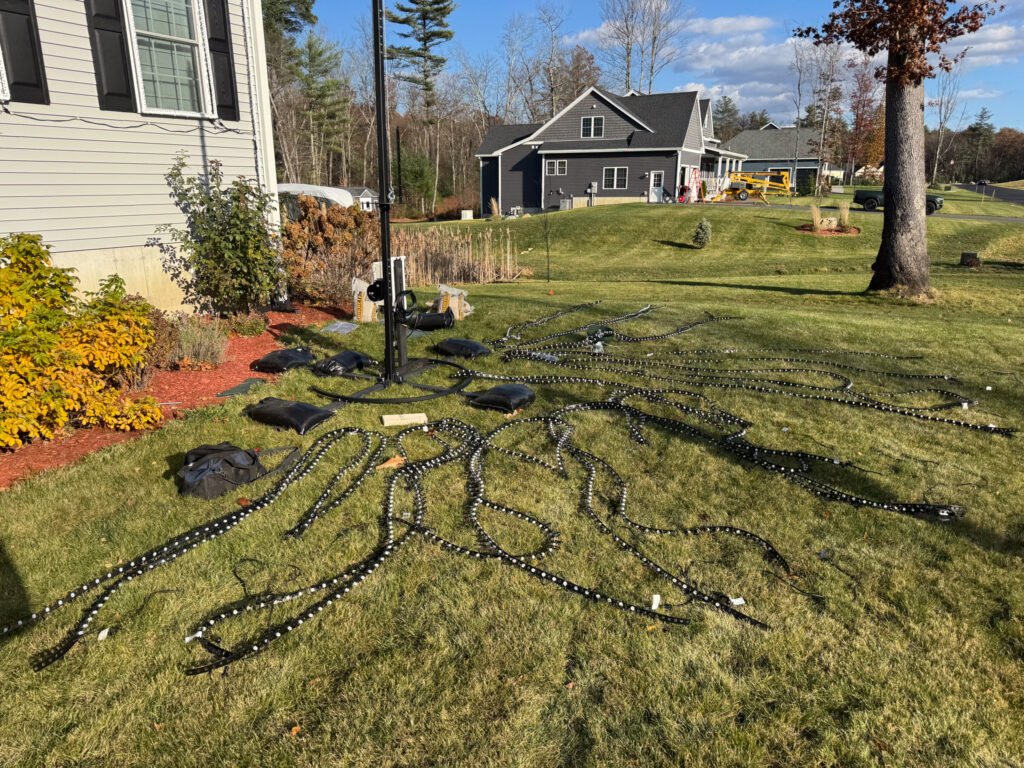
I bought the main beam, topper, winch, and hoop from Mattos, but here’s a money-saving tip: I grabbed 4-foot sections of 2×2 inch square tubing (¼-inch thick walls) off Amazon for the base. It wasn’t powder-coated, but it was cheaper and strong. I painted them black with spray paint.
Looking back, I probably could’ve saved more by bending my own hoop from EMT conduit (again, check Mr. Creeds’ guide), but sometimes paying for convenience is worth it.
Bottom line: Either method works. Pick the one that matches your budget, skill level, and patience for DIY fabrication.
Decision #4: Pixel Density
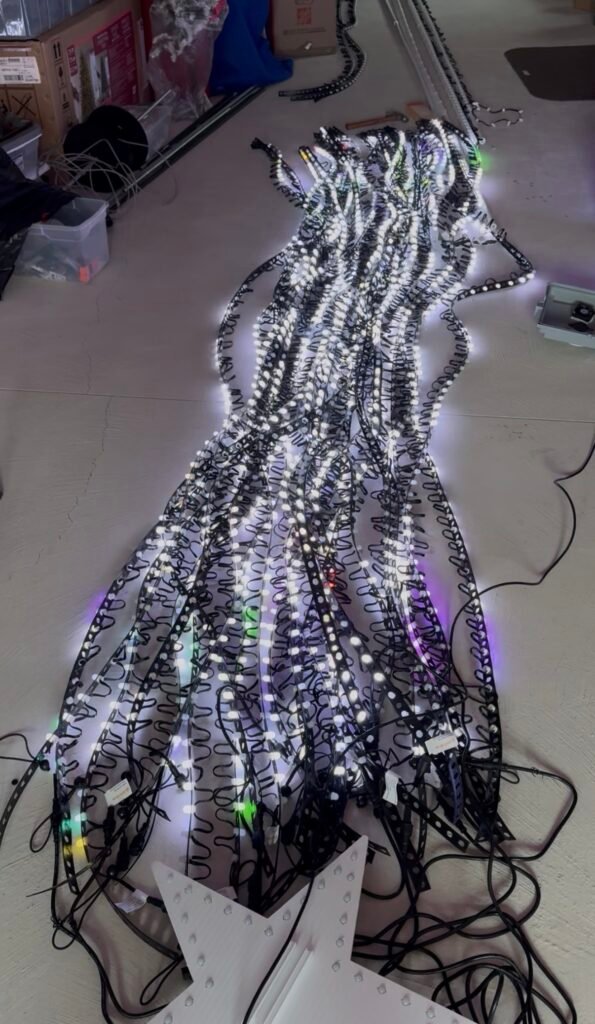
I used Boscoyo’s MegaTree Mounting Roll strips and went with every other hole, giving me 2-inch spacing between pixels. This is the sweet spot for me. Dense enough to see animations clearly, but not so crazy-dense that you’re drowning in pixels and cost.
Here’s the beautiful part: this isn’t a permanent decision. You can start with 2-inch spacing, run your show for a year, and if you decide you want more density, just fill in the holes you skipped. Update your xLights model using the “Alternate Nodes” setting, and boom, double the pixels without rebuilding everything.
My advice? Start with 2-inch spacing and see how you feel after your first season.
Decision #5: Stringing Strategy
I wanted to avoid power injection. Full stop. I did some math on strand length and to make each strand 75 lights bottom to top, with a full string being 150 lights. This meant I could run each string off a single controller port without worrying about voltage drop, color fade, or flickering.
I also didn’t want to cut pixel strands. I used 100-pixel and 50-pixel strands together. Made wiring simple and maintenance easier.
I mounted my controller at the base of the tree and ran a 20-foot cord directly up to the star topper, with 5 foot extensions to each string. Clean and straightforward.
The Tips Nobody Tells You (Until It’s Too Late)
Order early. Embarrassingly early. My parts took almost 5 months to arrive. MegaTrees are your biggest prop, manufacturers make limited quantities, and they sell out. Order in spring if you want it for December.
Build a spare string. I made one extra 150-light string. When (not if) a strand went wonky mid-season, I just swapped it out instead of troubleshooting individual pixels in the freezing cold. Fixed the bad one inside my warm house like a civilized human.
Leave 6-10 holes at the bottom. Keep those first pixel off the ground, especially if you get snow. Also, most people can’t see the base of your tree.
Overkill your guy wires. I saw multiple posts this winter about trees toppling and getting destroyed. I used spiral ground anchors from Home Depot (https://www.homedepot.com/p/Vortex-16-in-Steel-Folding-Ring-Spiral-Ground-Anchor-ANCFR16-ORG-A/202703690). Once the ground froze, you couldn’t pull these things out. (mine are staying in the ground through April) Pair them with quality steel cable and sleep better at night.
Do a test run: Set your tree up in early fall to test out the animations and lighting approach. I learned a lot here and it only took me about 30 minutes to set up my tree. You will need someone to help because it is so large.
Eyelet the tops of your strands. Use a 12mm eyelet punch and reinforce where your plastic mounting strips connect to the topper. Reduces fatigue on the plastic and held up great through wind and weather.
Bungee cords with knobs for the base. These “tarp ball bungees” (https://www.homedepot.com/p/Sigman-6-in-Tarp-Ball-Bungee-25-Pack-BB06B/203217327) give your strands flex in the wind and are way easier on the mounting strips than permanent anchors. They’re also stupid-easy to set up and take down.
Final Thoughts
Look, building a MegaTree isn’t trivial. It takes planning, some cash, and a decent chunk of time. But it’s not the monster project your brain is making it out to be.
Break it into these decisions. Pick your size. Pick your method. Order your parts early. And then just… build it.
Because next December, when that tree is the tallest thing on your block and people are pulling over to watch your show, you’re going to be really glad you didn’t talk yourself out of it.