Every “getting started with Christmas lights” guide will tell you about controllers, pixels, power supplies, and software. That’s all critical stuff, obviously.
But here’s what they won’t tell you: some of the most essential tools in my workshop this year weren’t the big-ticket items. They were the random discoveries and “why didn’t I buy this sooner?” moments that really helped.
This is that list. The stuff that didn’t make it into my initial plan but quickly became indispensable once the actual work started.
Automatic Wire Strippers: The Single Tool I Should Have Bought First
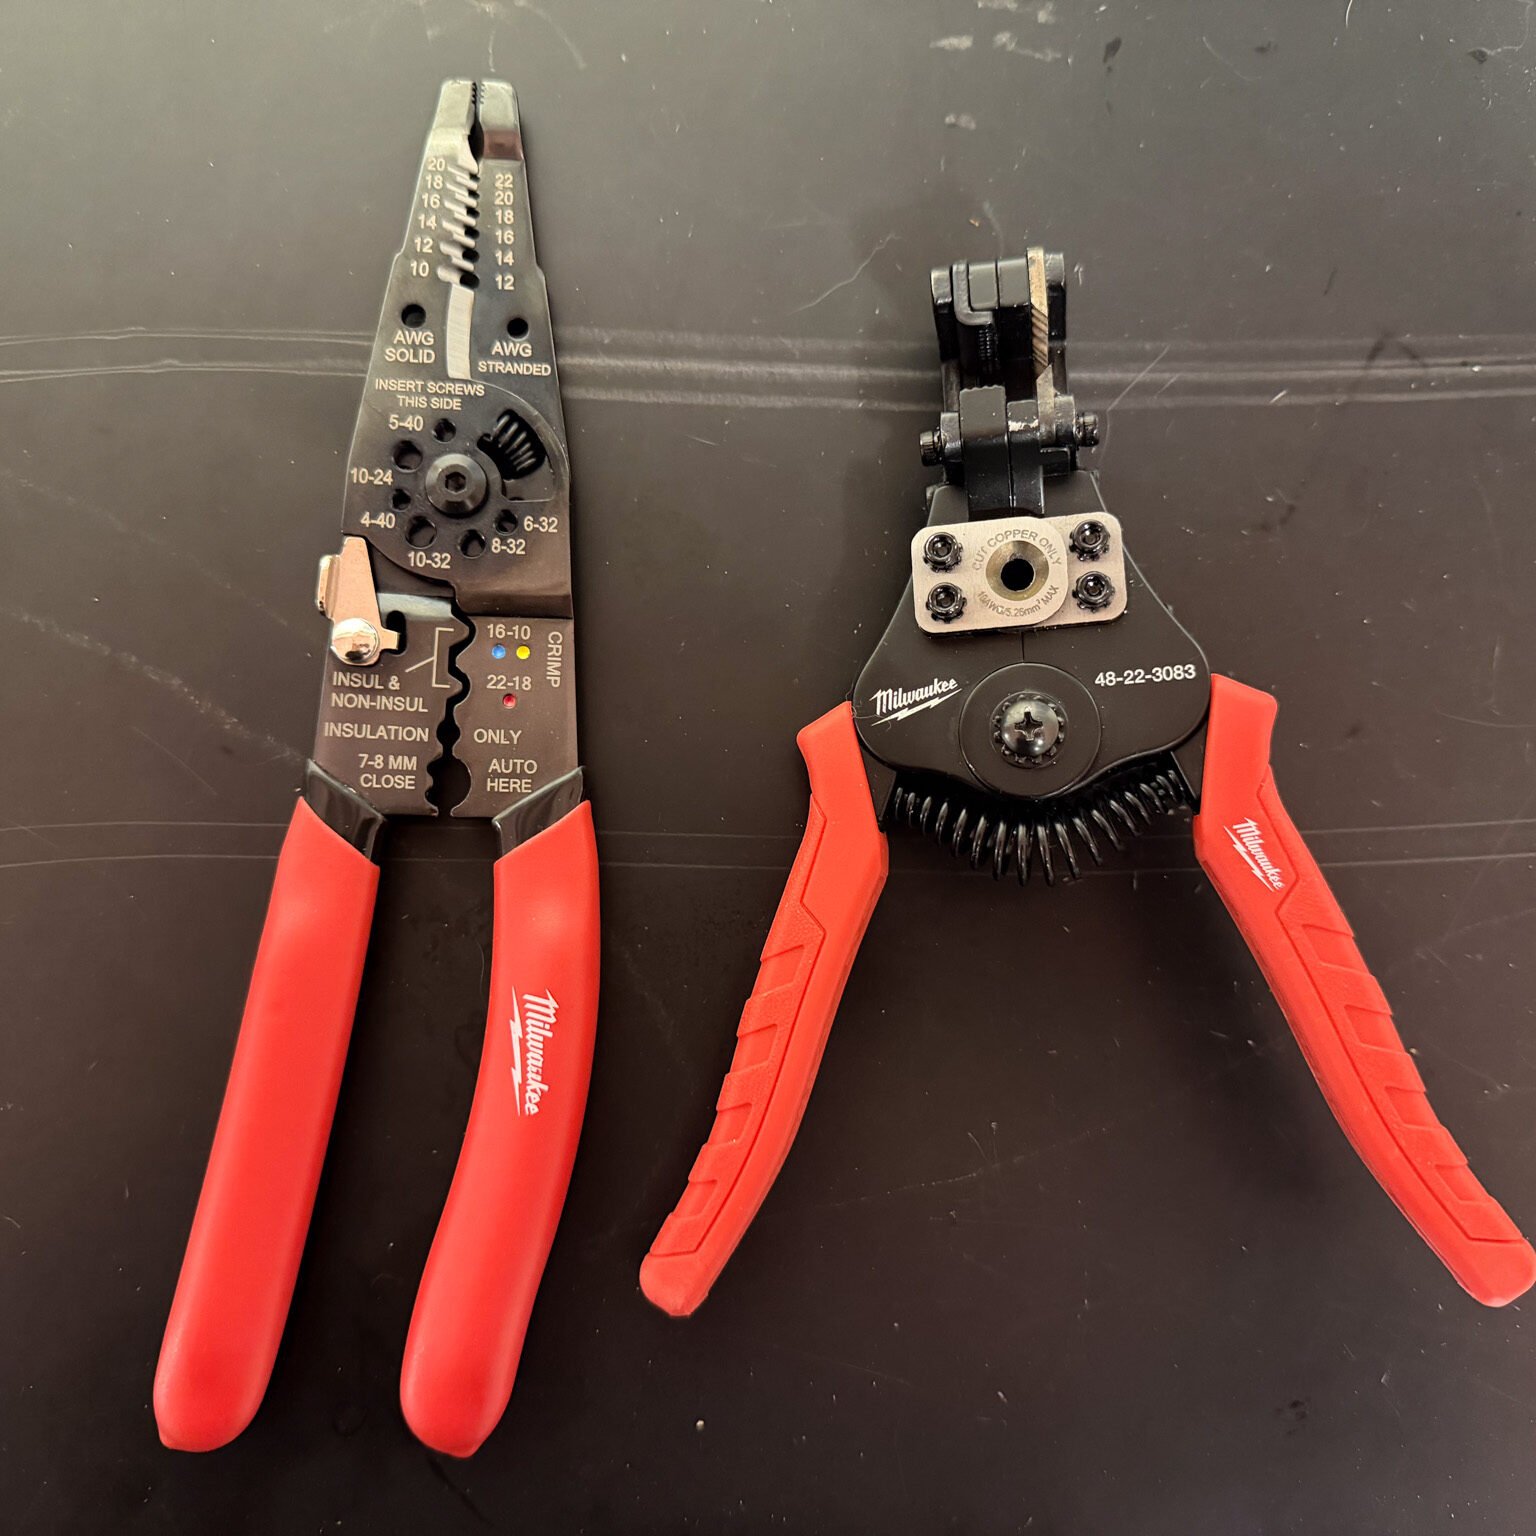
I started the season with manual wire strippers (on the left). After about the 20th wire, I was questioning my life choices.
What changed: I picked up a pair of self-adjusting automatic wire strippers mid-season and immediately wondered why I’d tortured myself for so long. Squeeze the handle… done. Perfect strip every time, no fuss, no nicked conductors.
What to look for: Self-adjusting models that work across multiple wire gauges (at least 10-22 Stranded Wire). I got a set of Milwaukee Automatic Wire Strippers at Home Depot. It is helpful to still have manual strippers because sometimes you have very small gauge wire, but I don’t use them often.
Label Maker: Because Future You Will Have No Idea What Anything Is
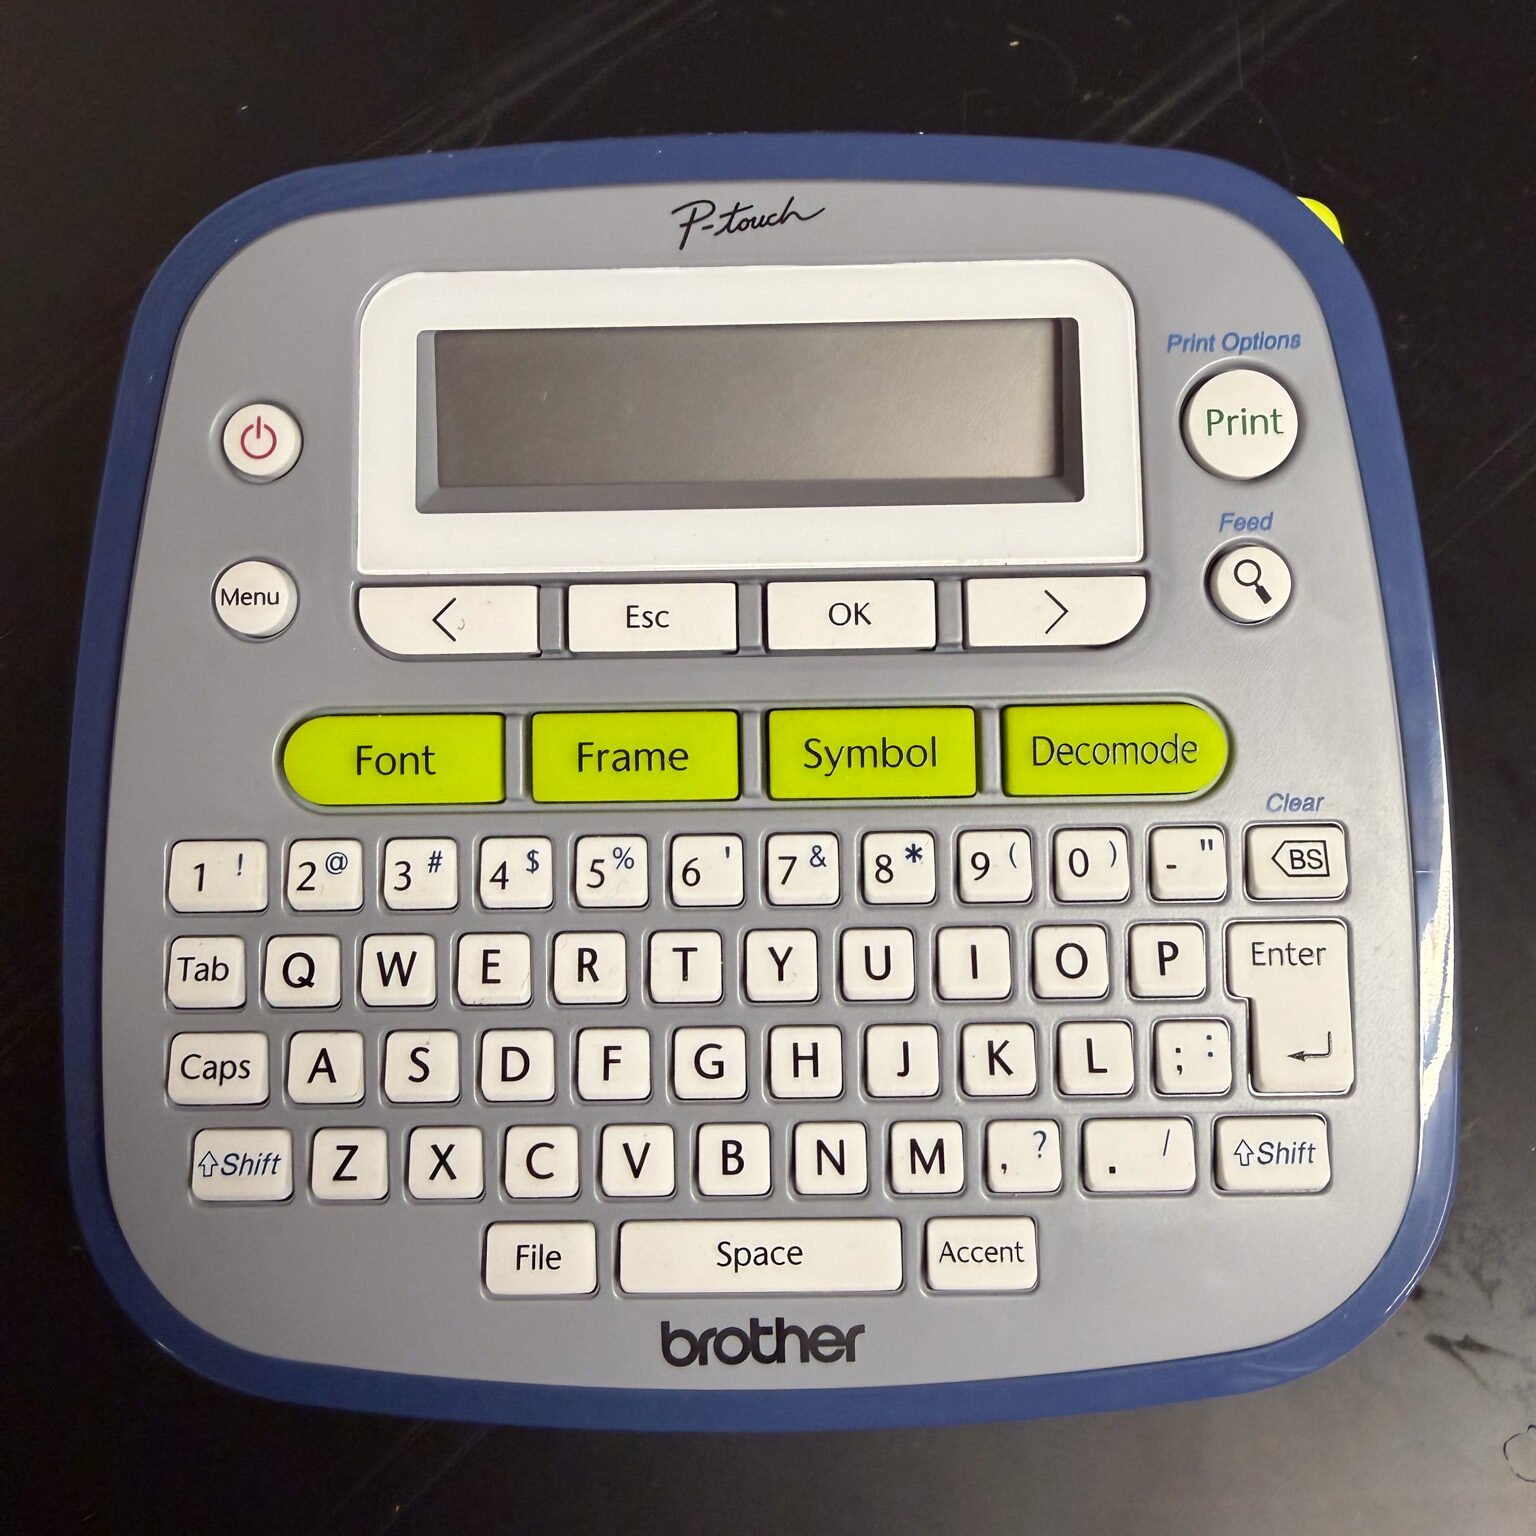
Label Everything. Label the label maker just to be safe. It is easy to find yourself staring at six identical black cords… no idea which is which. Make sure things like pigtails coming out of controller boxes are labeled. Also label plugs on the backside of props if you have multiple lines going to a single prop so you know which strand is which.
The lesson: Label everything. Controllers, extension cords, power supplies, prop connections, network cables, ports, all of it. Do it as you make the prop or touch the wire.
A basic label maker (the Brother P-Touch or similar) is essential. Every controller port got labeled with what was connected. Every extension cord and ethernet cord got tagged with its purpose. When it is cold, dark, and snowing, you will want labels to make troubleshooting easier.
Pro tip: Use outdoor-rated labels or clear packing tape over paper labels. Some labels don’t love getting wet repeatedly, but I didn’t have an issue with the Brother labels.
Color-Coded Electrical Tape: Visual Identification Made Easy
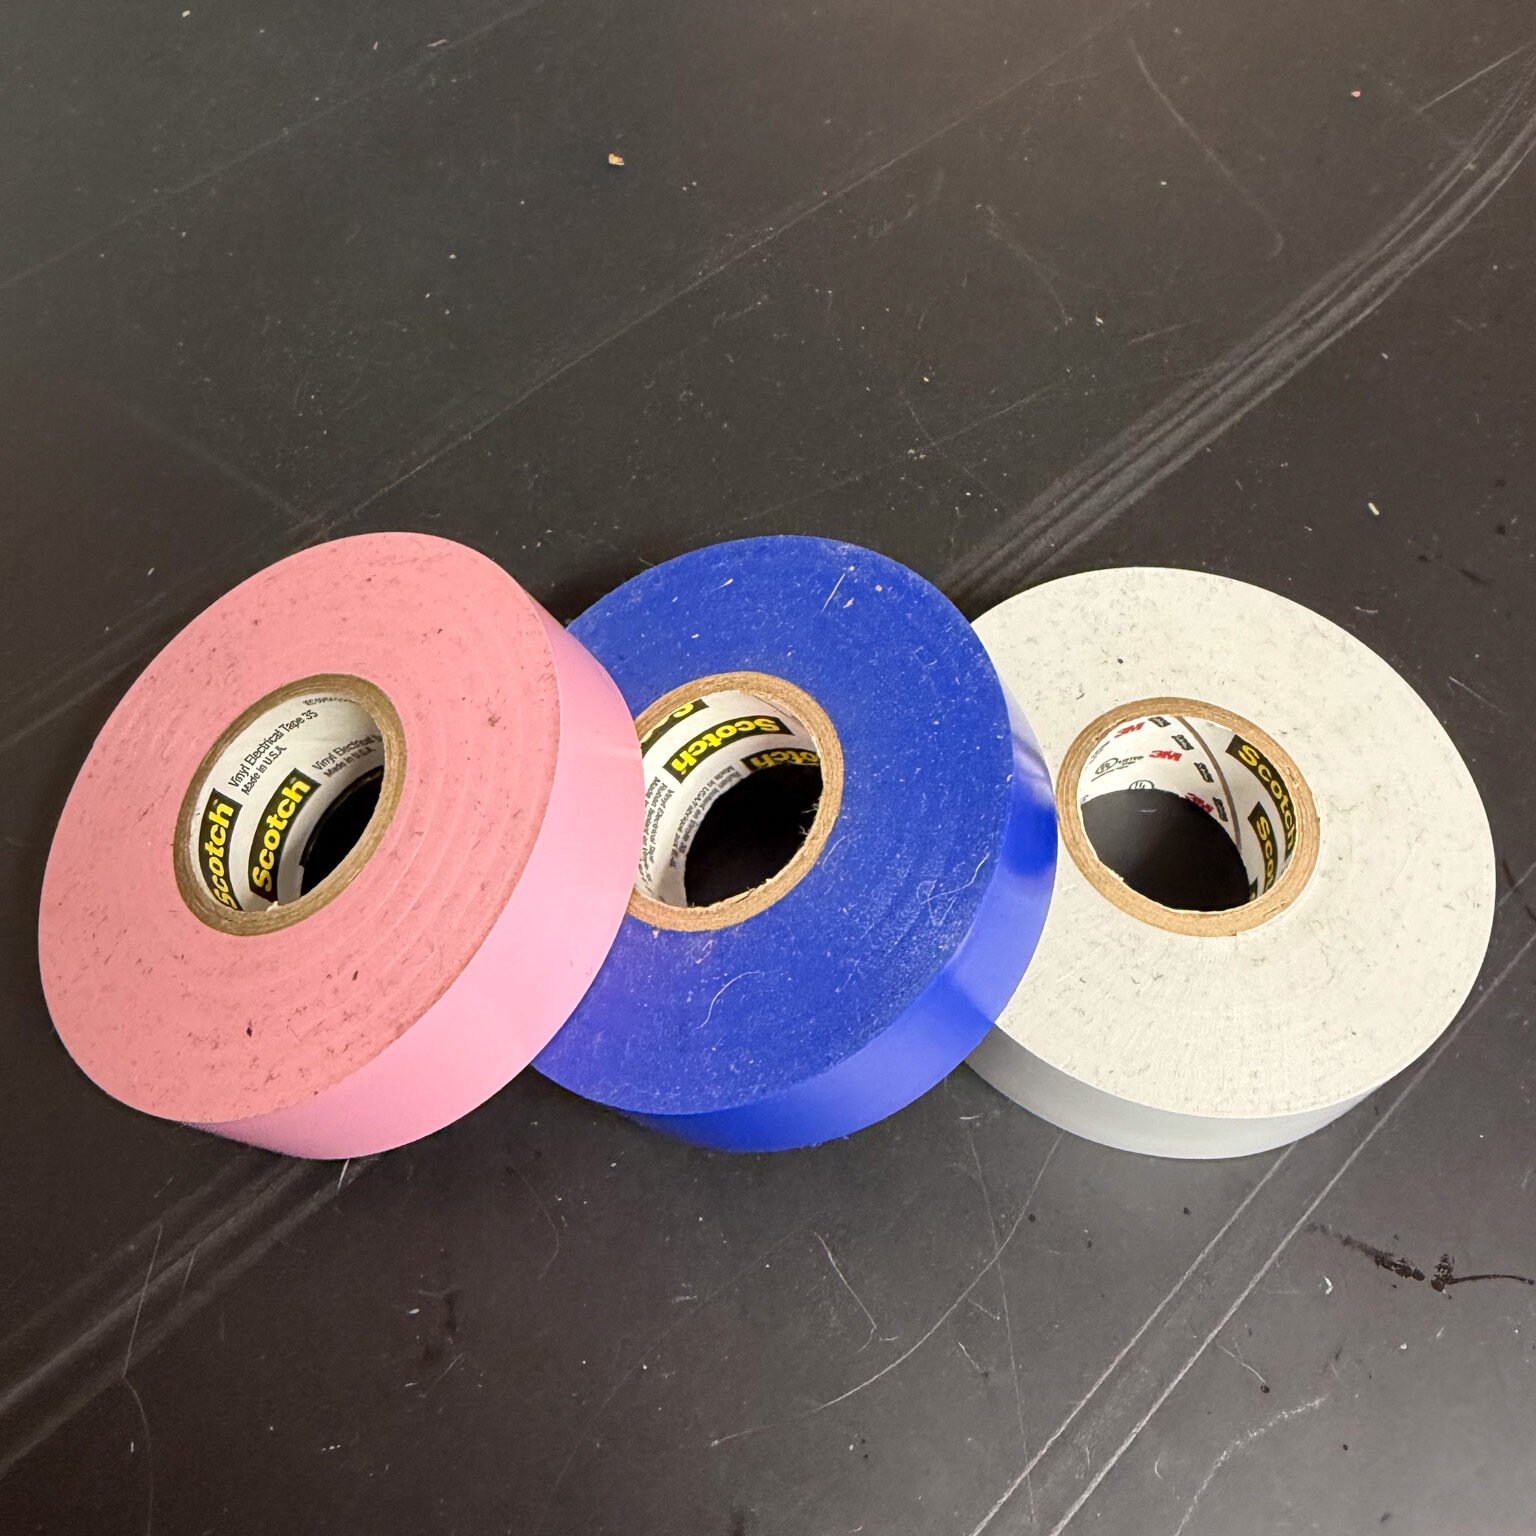
This pairs perfectly with the label maker for a two-layer identification system that actually works in the dark and cold.
I color-code all my pigtail extension cords:
- Red: 20 Foot
- Blue: 10 Foot
- Grey: 5 Foot
For my house outlines, where I have multiple runs over 20 feet, I created colored line patterns so that I could easily identify where pieces connect to one another. This makes installation much more efficient.
I picked up my tape at Home Depot, and it did just fine in the cold, but there are likely cheaper options on Amazon.
Storage Containers with Dividers: Taming the Spare Parts Chaos
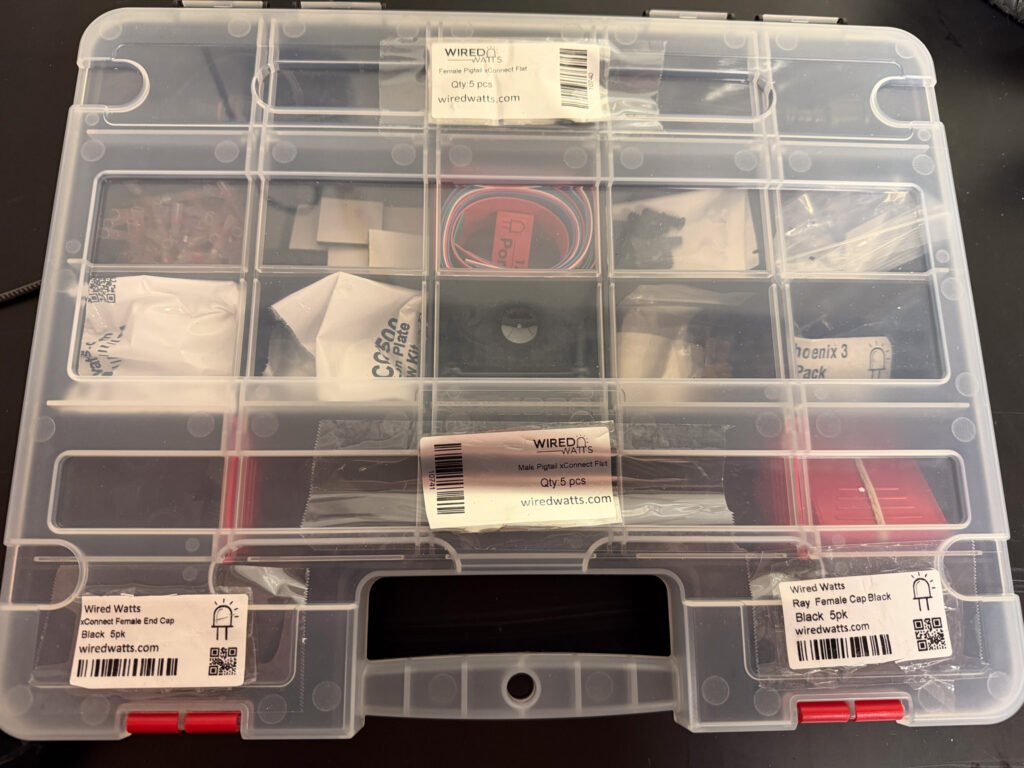
You are going to have so many spare parts. You need to keep them organized. When a pixel goes dark you don’t want to waste a bunch of time and energy finding fittings, clickets, wire, etc.
Getting organized with storage containers will simplify everything. I went to Walmart and got a couple storage containers for small items like screws, fuses, xConnect caps, etc. and now there is a place for everything.
What works: Clear plastic organizer boxes with adjustable dividers. The kind meant for fishing tackle or craft supplies. I use them for:
- Extra pigtails and connectors
- Fuses, wire nuts, and small electrical parts
- 3d Printed Brackets
The system: Label each container with broad categories (Pixels, Power, Mounting, etc.) and use dividers to separate types within each box.
Bonus: these containers stack well for off-season storage. Everything stays organized year to year instead of becoming a giant pile of “I’ll figure this out next November.”
Clickits: The Pixel Repair Savior
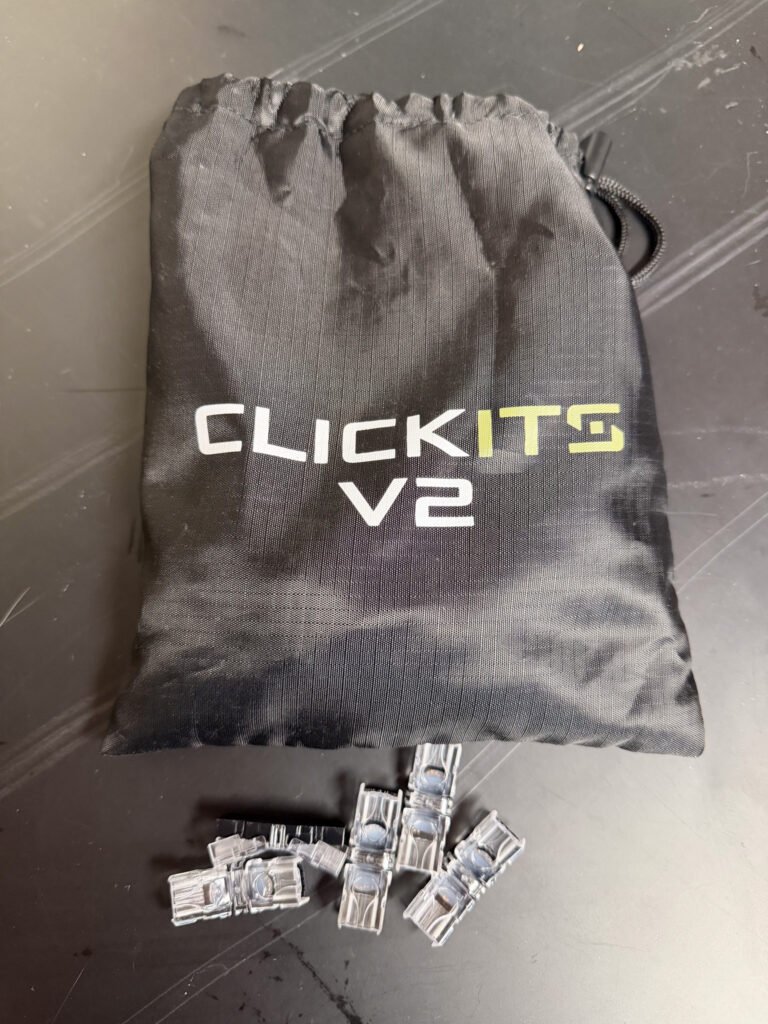
This is the one tool that’s specific to the pixel light hobby but absolutely essential once you know about it. I wish someone had told me about clickets before I spent hours fighting with heat shrink and weatherproofing tape on my first pixel repairs.
What they are: Clickits (sometimes called gel-filled splice connectors) are small wire connectors pre-filled with waterproof gel. They’re rated for permanent usage outdoors, which makes them perfect for repairs. You cut the wire and insert it directly into the connect and squeeze with pliers. You don’t need to strip the wires. The metal crimp makes the connection, and the gel seals it completely.
Why they’re game-changers:
- Truly waterproof: That gel isn’t decorative. It keeps moisture out permanently, even in direct rain and snow.
- Fast repairs: No heat shrink, no tape, no hoping your splice stays dry. 30 seconds and you’re done.
- Reliable: I’ve had exactly zero failures on clicket repairs.
Where I use them:
- Field repairs on damaged pixel strings
- Extending pixel runs that came up a few feet short
Buy them in packs 100. A single pixel repair takes 2 (one on either side of the pixel) and I went through about 40 in my first season between repairs, making wires, and cutting strands shorter.
Dielectric Grease: The Unglamorous Hero of Outdoor Connections
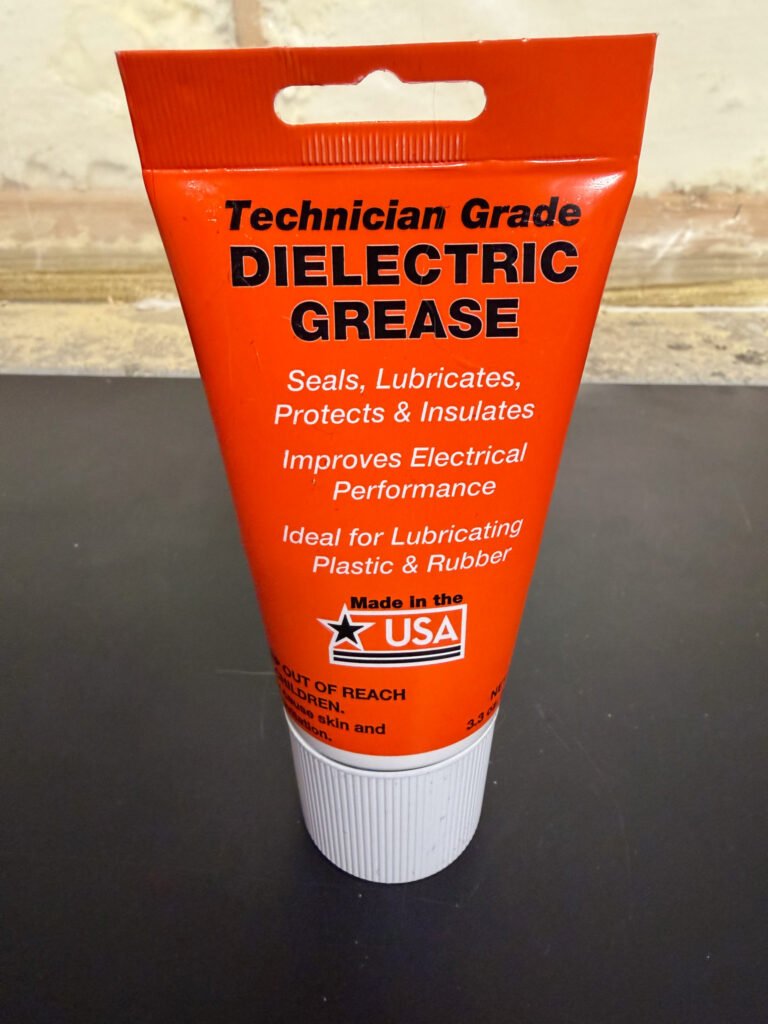
Speaking of waterproofing, while clickets handle repairs, dielectric grease protects every other connection from moisture issues.
I’d heard about dielectric grease in passing but figured it was optional—one of those “nice to have” things that experienced builders use but beginners can skip.
Despite my cords having an O-Ring, water still gets into the connector. I use the grease with all my electrical connections. Apply it before you put your props out.
What it does: Creates a waterproof barrier in electrical connections. You apply it to connections before assembly, and it keeps moisture out while maintaining conductivity.
Stepped Drill Bits: Perfect Holes in Electrical Boxes Every Time

I house all my controllers in waterproof. Some boxes come pre-drilled, but many (like ammo boxes) usually don’t. On top of it, glands are all different sizes. Picking up a stepped drill bit is essential to make the right size hole without having to always search for a different drill bit. They are a bit expensive, but you only need one and it will save a bunch of time.
How they work: Cone-shaped bits with multiple diameter steps. You drill to the size you need, stop, done. Clean holes, no splitting or cracking, perfect for cable glands or knockout holes.
Size range: Get bit that goes up to an inch. That covers most cable and connector sizes you’ll encounter. Mine is only 7/8 and I spent too much time rounding out holes to make them larger.
WYZE Camera: Show Monitoring and Troubleshooting from Inside
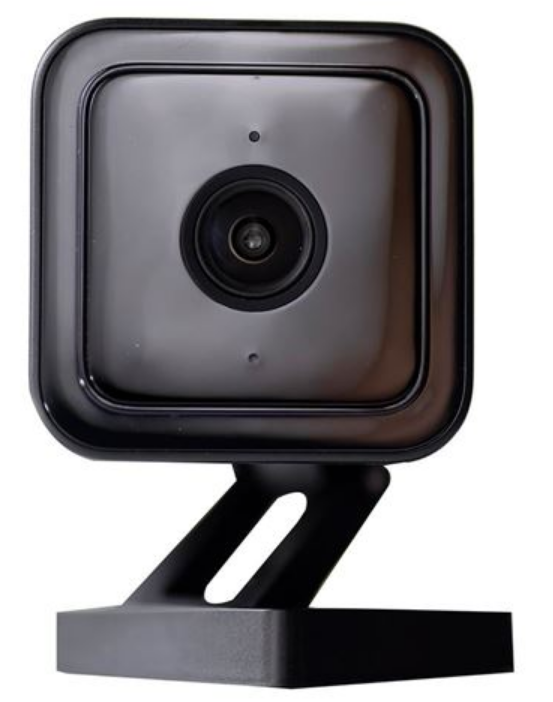
This one’s specific but brilliant. I mounted a WYZE Cam v4 camera facing towards the street so I could see my display, and the road.
Why it matters:
- Remote monitoring: I can check if everything’s running from anywhere
- Visitor engagement: I can see when cars stop to watch the show, which helps me understand which songs and sequences get the best reactions.
- Security: Bonus peace of mind knowing I can check the front yard and display at any time.
- Logging: If anything happens in front of your house (e.g., two cars hitting one another… speaking from experience) it is helpful to have a video of what happened
The WYZE Cam works great for this. Excellent night vision, weatherproof, cheap enough that it’s not a huge investment.
Setup tip: Position it high enough to get a good overview but low enough that you can see detail on ground-level props. You want to be able to identify specific elements, not just see a general glow.
The Pattern: Solve Problems As They Appear
None of these tools were on my original shopping list. They all came from some need that I encountered.
My advice: Don’t stress about having everything figured out before you start. Get your core gear (controllers, pixels, power, software), then add to your toolkit as you discover what you need. Keep a running list of “things that would make this easier,” and tackle it between projects or seasons.
That said, if you’re just starting out and want to skip some of my learning curve? Start with the wire strippers, label maker, and clickets. Those three will pay for themselves in the first weekend of pixel pushing.
The Real Essential: None of these tools are glamorous. Nobody’s going to look at your show and say “wow, I bet they use great wire strippers.” But they’re the difference between spending your time creating sequences and fixing problems versus fighting with basic tasks and troubleshooting the same issues repeatedly.
Build your show. Learn what slows you down. Fix those bottlenecks. Repeat next season.